The cruise control man switch takes up a full slot in the dash. This article describes in detail how you can replace it with a double function comboswitch from a NB Miata.
If you have cruise control and a defogger, you run out of options if you want to install an additional switch (e.g. fog-lights) in the dash without losing the stock look:
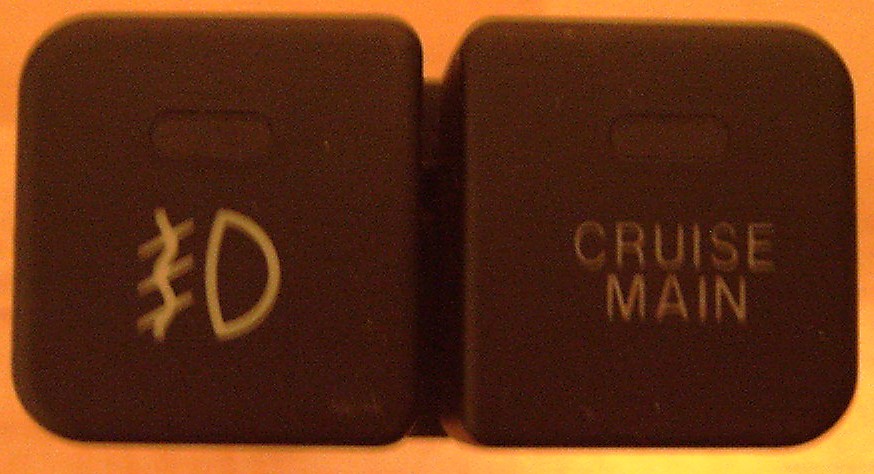
The second generation Miatae (NB, 1999 and up) have a cruise control and fog-light combination switch:
That switch seems to be shaped to fit exactly in the same location as the NA switches:
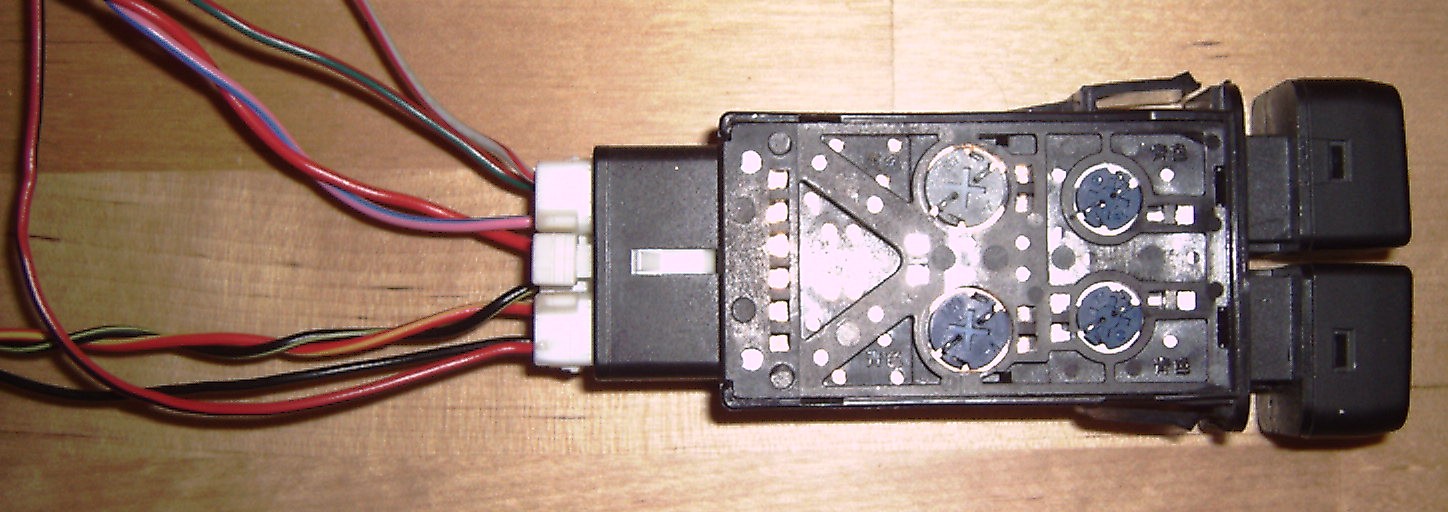
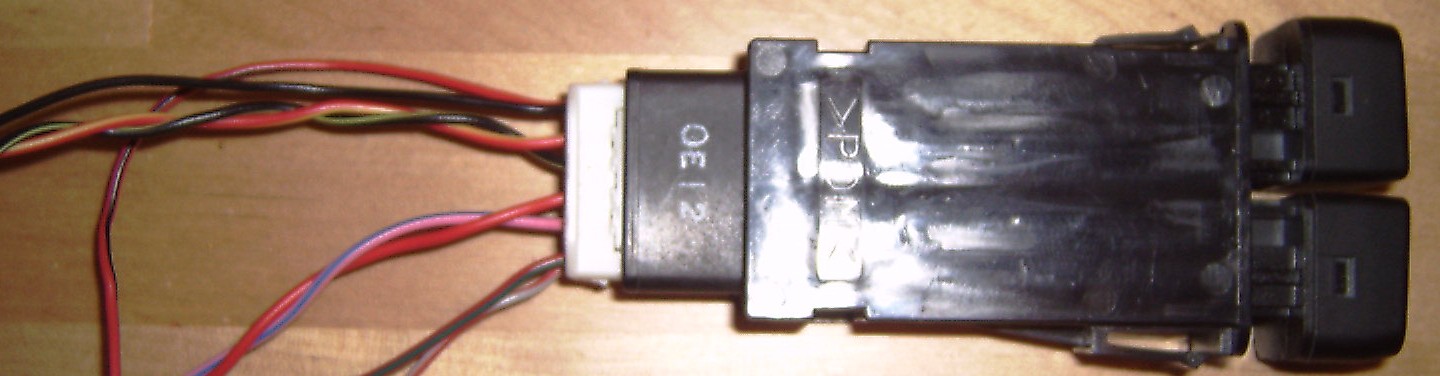
Indeed, it fits perfectly into any of the three holes on the left (it'll probably also fit in the one on the right, but there's the power mirror switch). However, it uses a different number of wires to accomplish the task of switching:
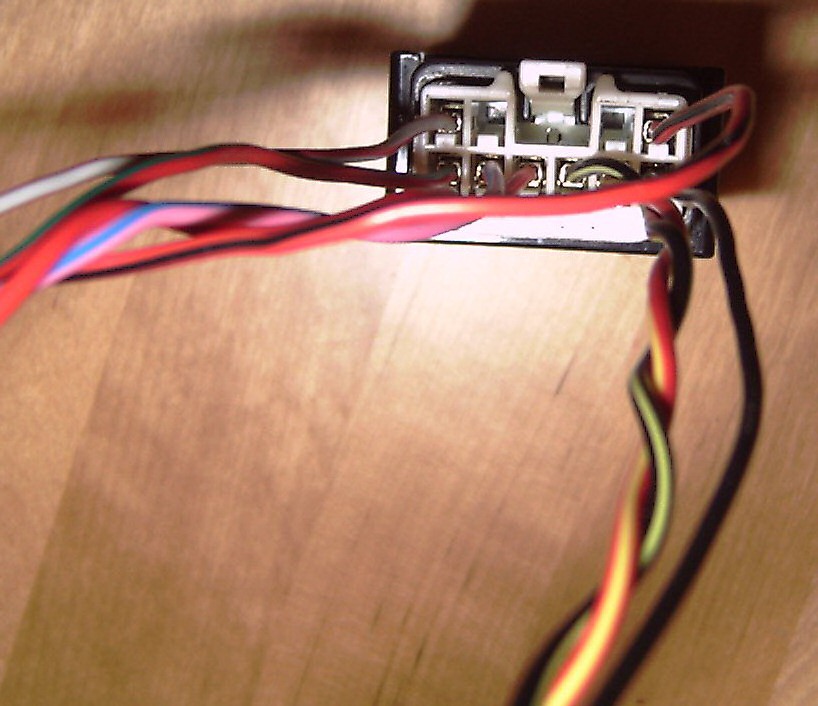
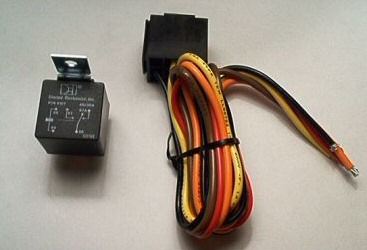
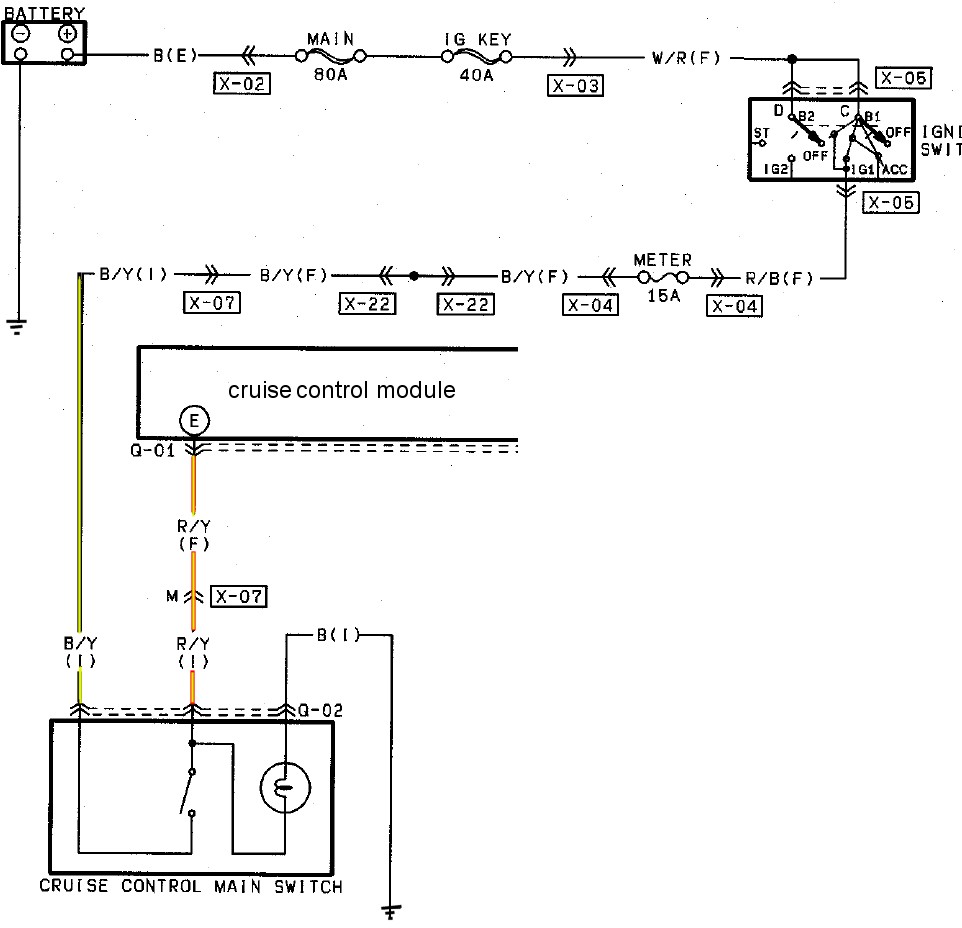
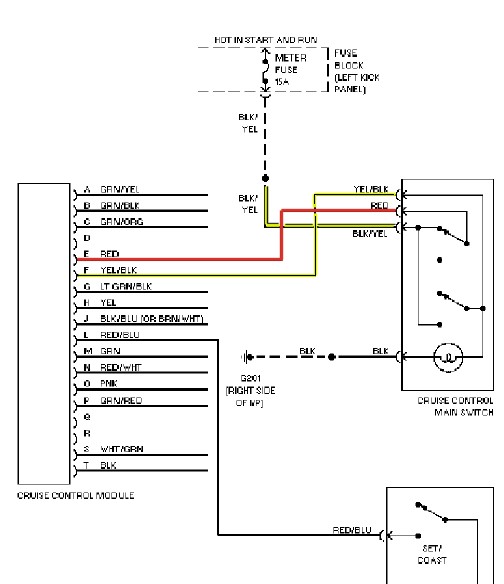
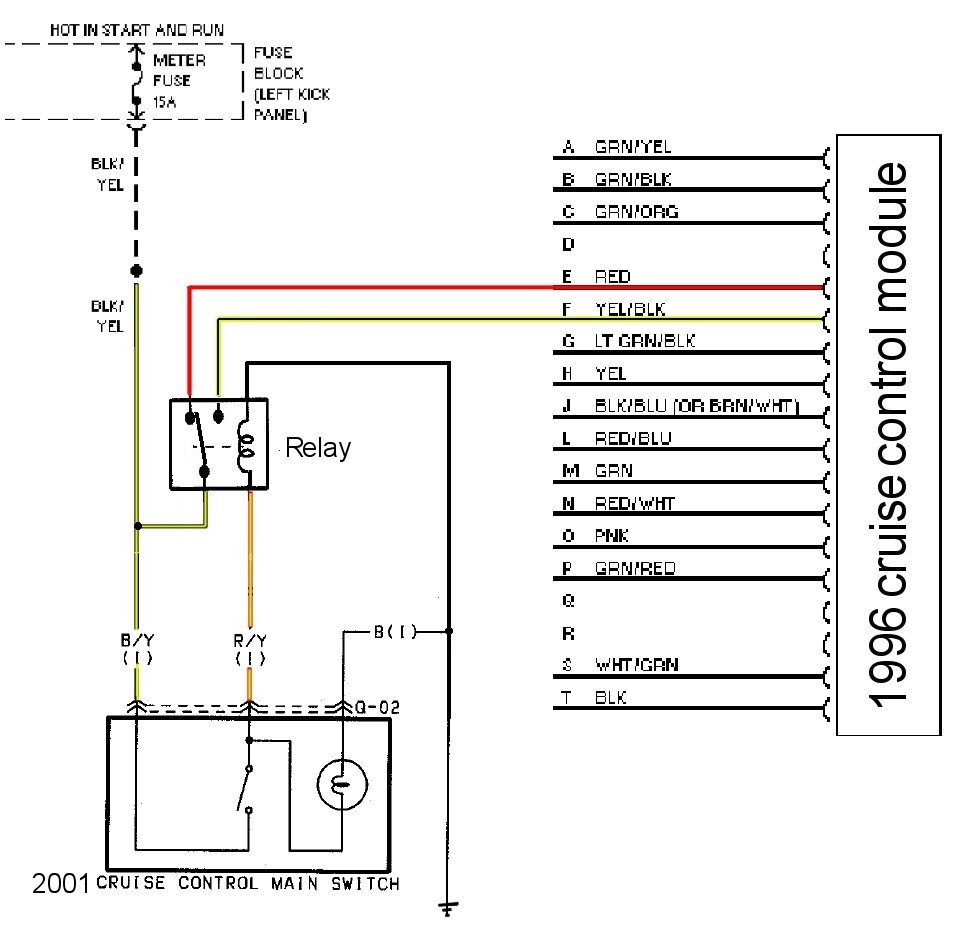
The pin-out diagram shows the wires for the different pins. The 6 wires in the lower row are for switching, the two wires in the upper row (grey/red and red/black) are for letter illumination. The wiring diagram for the switch from a wrecked '01 shows the switching mode in the NB. The NA wiring diagram for the '96 shows the difference: there's basically two switches in the NA switch. A simple Bosch-type relay can help here:
Using this modified wiring diagram, one can solder a harness that only needs to be soldered to the wires for the cruise control to replace the NA cruise main switch with the NB comboswitch:
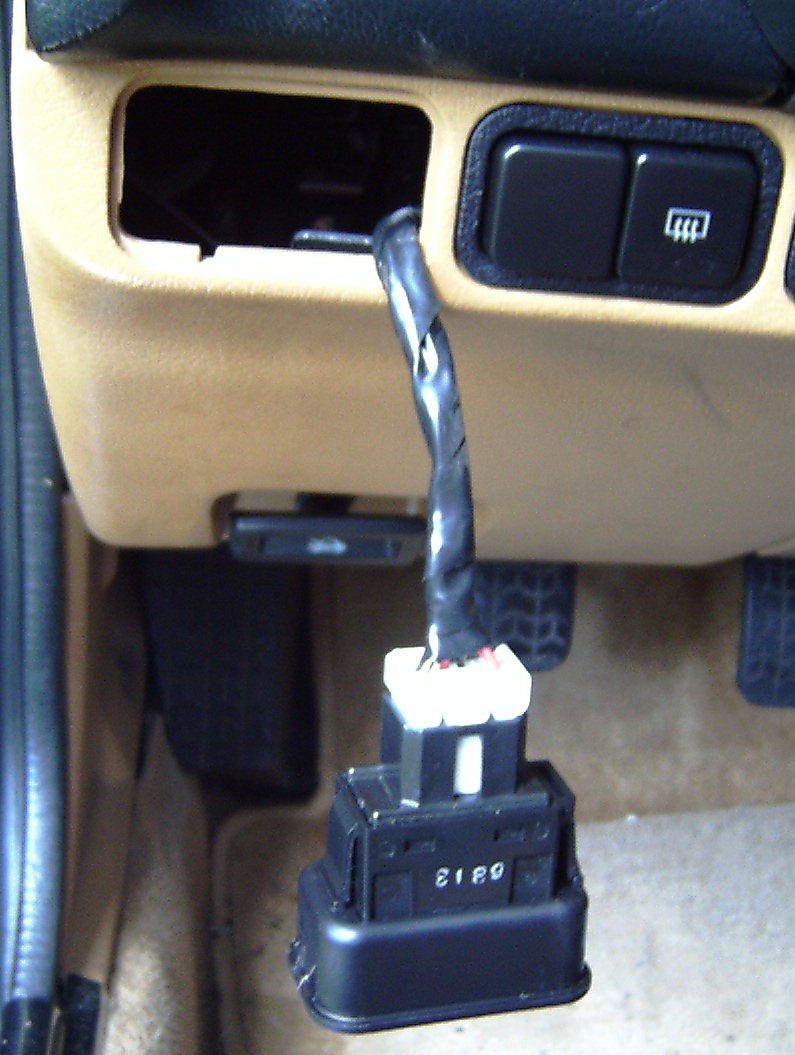
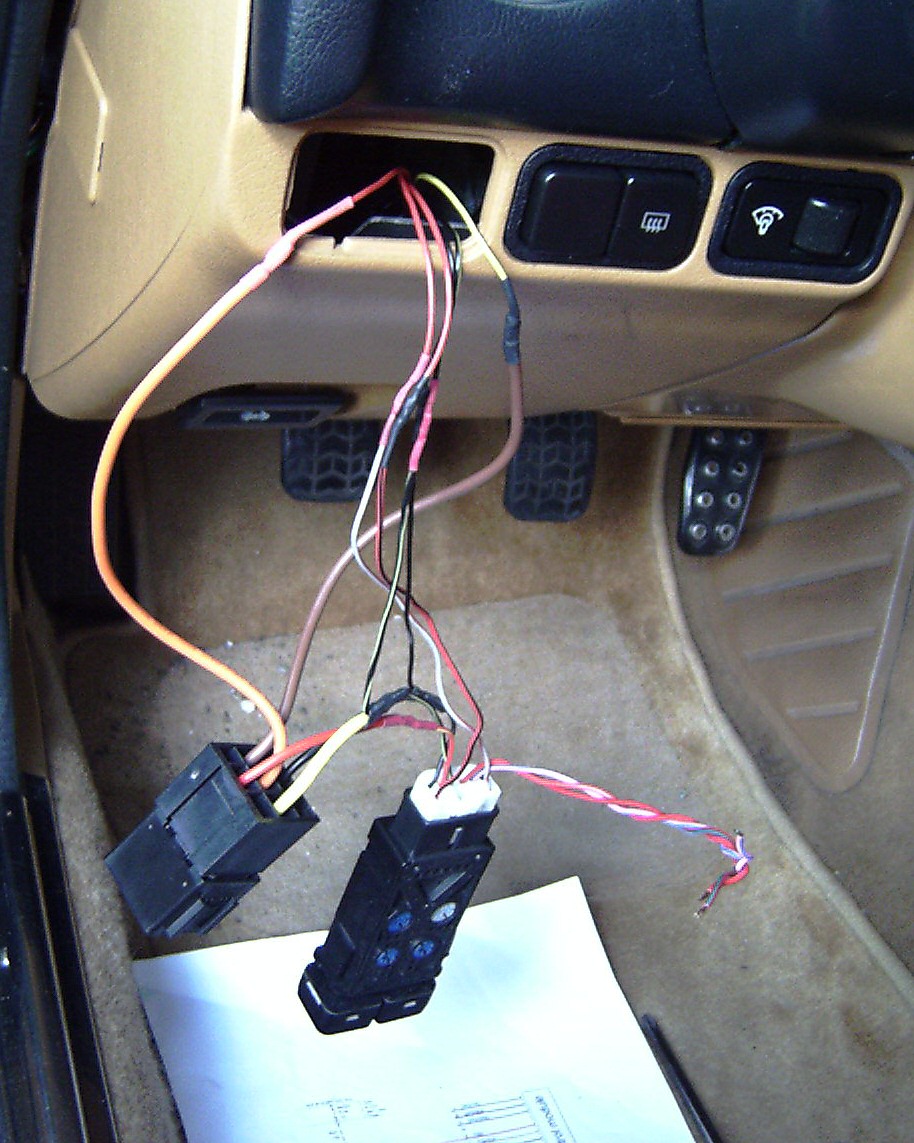
Installation is easy. First you pry out the old switch:
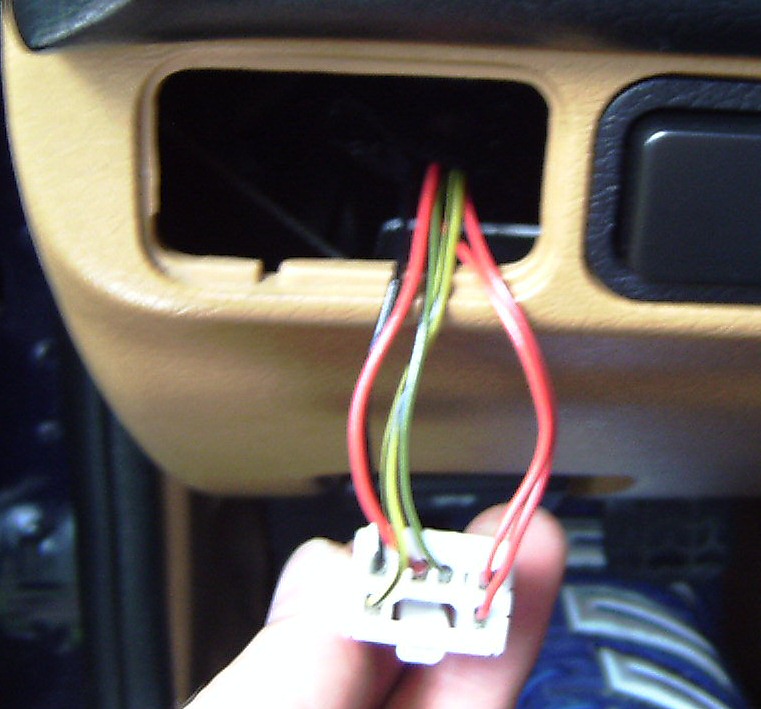
On the right you can see the red and red/black wires used for the illumination of the lettering on the switch (they go to the grey/red and red/black wires from the NB switch):
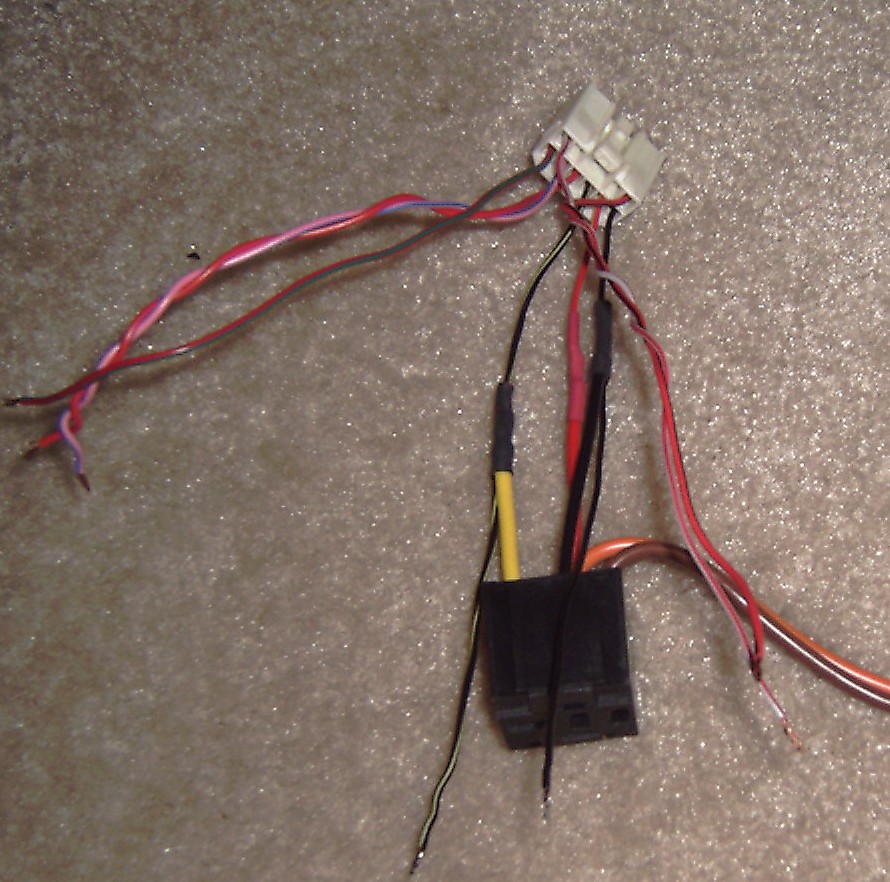
You cut the wires and solder them to the appropriate wires from your harness. The ones not soldered in the picture below are the three from the fog-light part.
Below is what the final product looks like:
Fully functional and completely stock looking. But let me give you one last piece of advice: if you'd like to avoid painful distortions of your hands and neck, make sure your relay fits through the plug-hole before you solder everything together (don't ask!! LOL !
Render time: 0.0778 sec, 0.0087 of that for queries.


 !
!